Create Schedule
Purpose
The Create Schedule page allows you to create a new event/schedule with all necessary details including timing, location, team assignments, and availability settings. This is where you configure a new schedule before publishing it to your team members.
Route
/manage/schedules/create
Screenshot
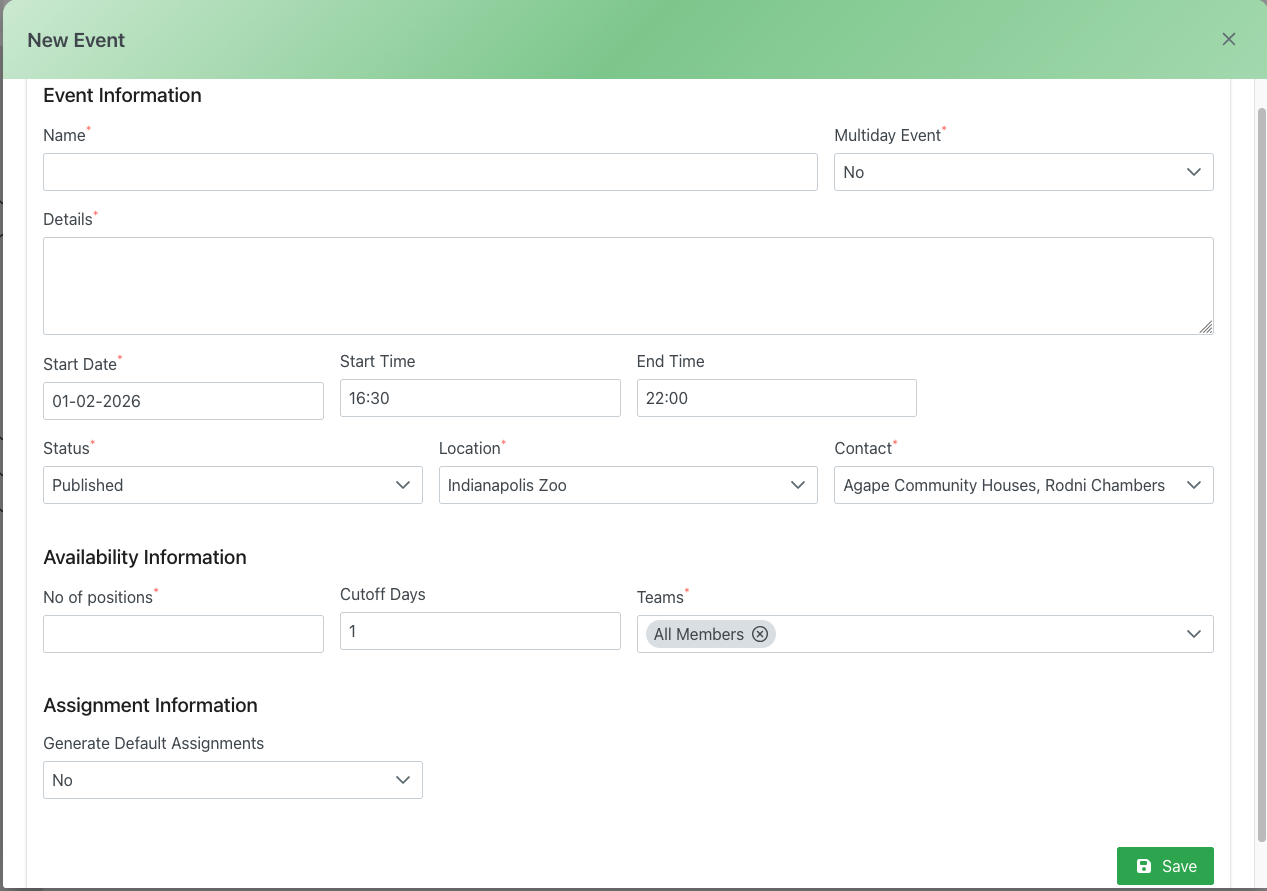
New Event form showing event information, availability settings, and assignment options
Description
The New Event form is organized into three main sections:
Event Information
This section captures the core details of your schedule:
- Name: Enter a descriptive name for the schedule/event
- Multiday Event: Toggle to indicate if this event spans multiple days
- Details: Add any additional information or notes about the event
- Start Date: Select the date when the event begins (format: MM-DD-YYYY)
- Start Time: Set the start time for the event
- End Time: Set the end time for the event
- Status: Choose the publication status:
- Published: Event is live and visible to members
- Draft: Event is saved but not yet visible
- Archived: Event is no longer active
- Location: Select the venue or location where the event takes place
- Contact: Assign a primary contact person for the event
Availability Information
Configure team member availability and position limits:
- No of positions: Specify the total number of volunteer positions available for this schedule
- Cutoff Days: Set how many days before the event members can no longer sign up or make changes
- Teams: Select which team(s) can view and sign up for this schedule. Use "All Members" to make it available to everyone, or select specific teams
Assignment Information
Control how positions are filled:
- Generate Default Assignments: Choose whether to automatically assign members to positions based on their preferences and availability
- Yes: System will auto-generate initial assignments
- No: Manual assignment required
Actions
- Save: Click the green "Save" button to create the schedule with the configured settings