Details Tab
Purpose
The Details tab provides a comprehensive overview of a specific schedule/event, displaying all key information in one place. This is the default view when opening a schedule and allows members to view event details and manage their participation.
Route
/auth/calendar/eventView?id={schedule-id}
Screenshot
Description
The Details tab is organized into several key sections:
Navigation Tabs
At the top of the page, you'll find multiple tabs to navigate different aspects of the schedule:
- Details (current tab): Overview of event information
- Members: View and manage team members assigned to this schedule
- Check-In: Track member check-ins for the event
- Check-Out: Record member check-outs after the event
- Stands: Manage position assignments and stands
- Adjustments: Make changes to assignments or timing
- Stats: View statistics and analytics for the schedule
- History: Review change history and audit logs
- Additional action icons for notifications and security settings
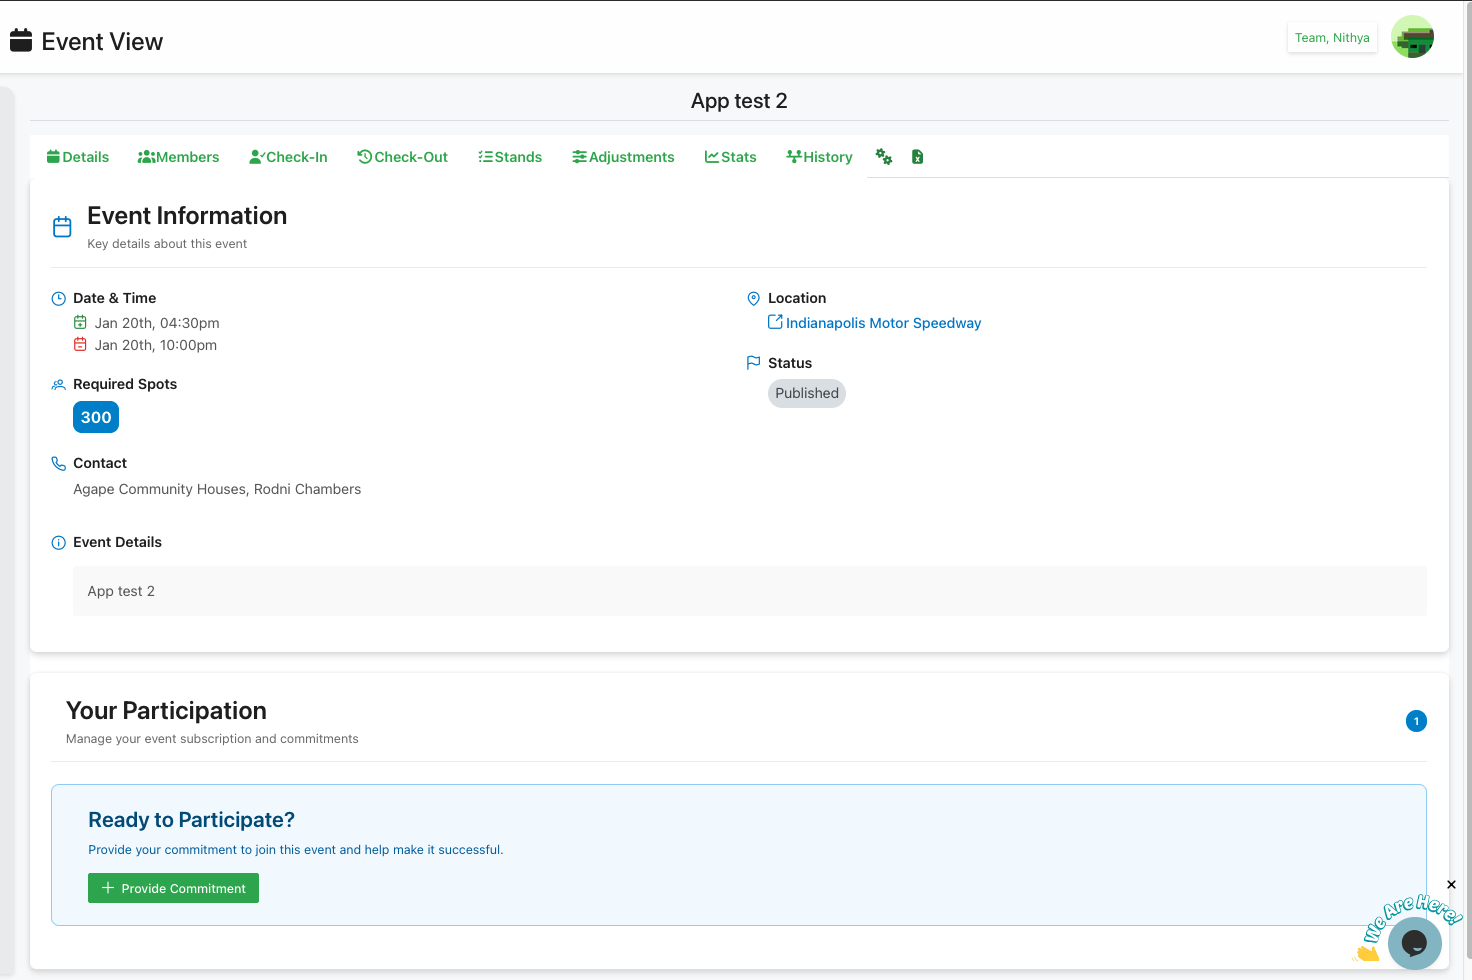
Event Information
This section displays all the core details about the schedule:
Date & Time
- Shows both start and end times for the event
- Displays in an easy-to-read format (e.g., "Jan 20th, 04:30pm" to "Jan 20th, 10:00pm")
- Calendar icons indicate date/time information
Location
- Displays the venue name as a clickable link
- Clicking the location opens more details about the venue
Status
- Shows the current publication status of the event (e.g., "Published")
- Indicates whether the event is visible to team members
Required Spots
- Displays the total number of volunteer positions needed
- Shown as a badge with the number prominently displayed
Contact
- Lists the primary contact person or organization for the event
- Provides reference for who to reach out to with questions
Event Details
- Shows any additional notes or description entered when creating the schedule
- Provides context and important information for participants
Your Participation
This section allows members to manage their involvement with the event:
Participation Management
- Subtitle: "Manage your event subscription and commitments"
- Provides an interface for members to sign up or commit to the event
Member Participation Workflow
Members can participate in an event through the following steps:
-
Subscribe and Commit:
- Click the Provide Commitment button from the "Ready to Participate?" card
- In the subscription dialog:
- Specify the Number of Resources they can facilitate for the event
- Add Additional Details explaining their commitment (minimum 10 characters required)
- Click Commit to submit their subscription
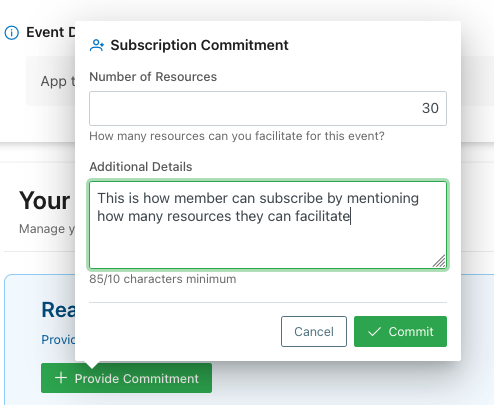 Subscription commitment dialog showing number of resources field and additional details textarea
- Status changes to Subscribed with requested spots displayed
- Members can Modify their commitment later if needed
 Subscribed status showing requested spots with modify button
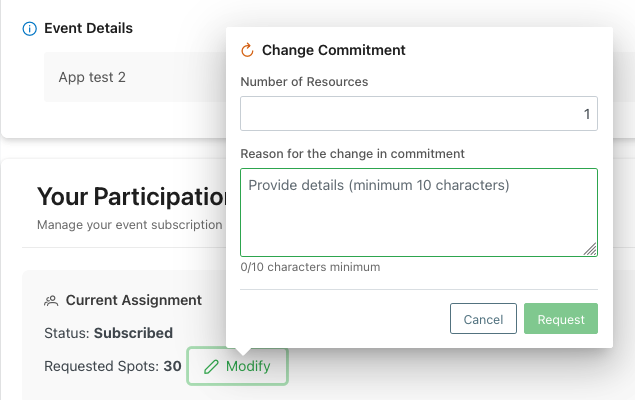 Change commitment dialog for modifying subscription details
 -
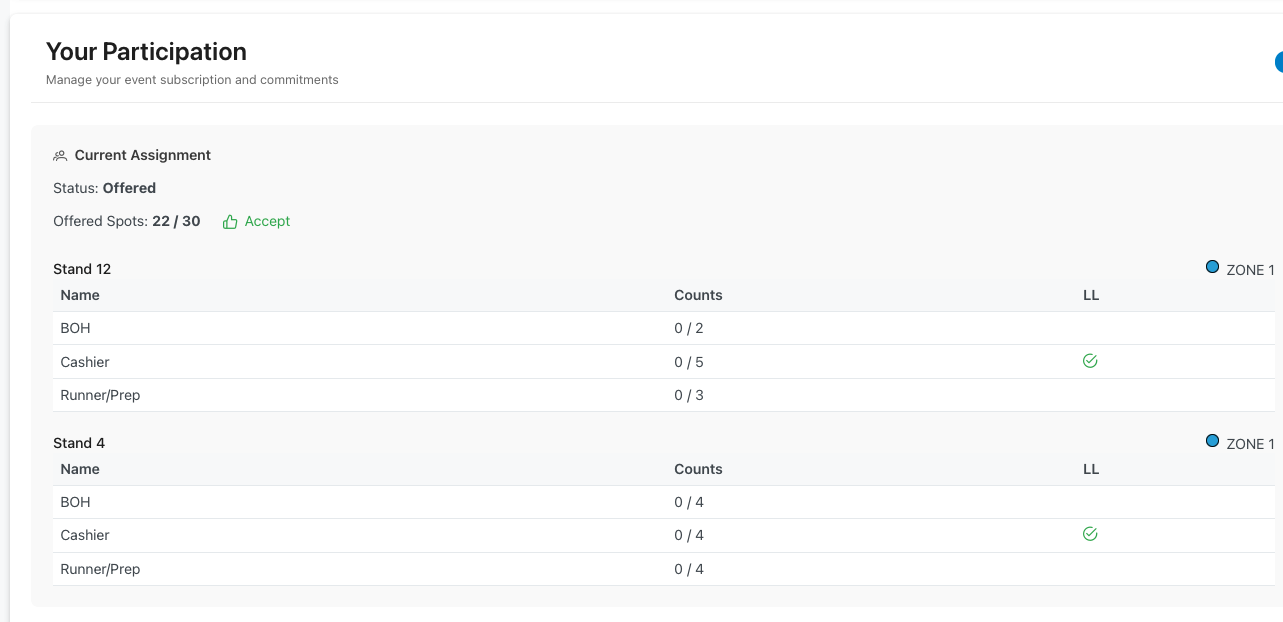
Accept Offer:
- Once the organizer assigns stands and positions, the status changes to Offered
- View Offered Spots (e.g., "22 / 30" showing assigned vs requested)
- Click the green Accept button to accept the assignment
 Offered status showing offered spots count with accept button
- In the acceptance dialog:
- Optionally provide additional details (minimum 10 characters)
- Note: "Accepting the offer will confirm the spots and you can assign resources"
- Click Accept Offer to confirm
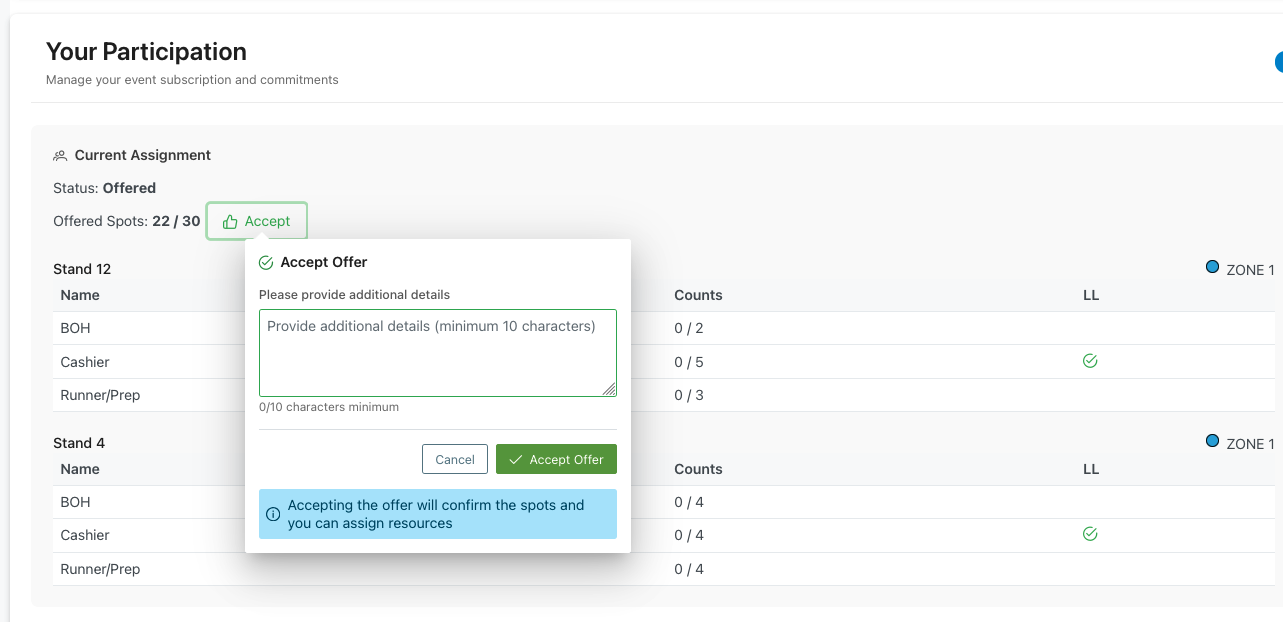 Accept offer dialog with additional details field and confirmation message
- Status changes to Accepted showing accepted and assigned counts (e.g., "Accepted: 22/30, Assigned: 0/22")
-
Assign Resources:
- After accepting, view the assigned stands and positions in a table
- Each stand shows:
- Stand number and zone
- Position names (e.g., BOH, Cashier, Runner/Prep)
- Current counts (e.g., "0 / 2" showing filled vs available)
- LL (Lead Leader) indicator with checkmark
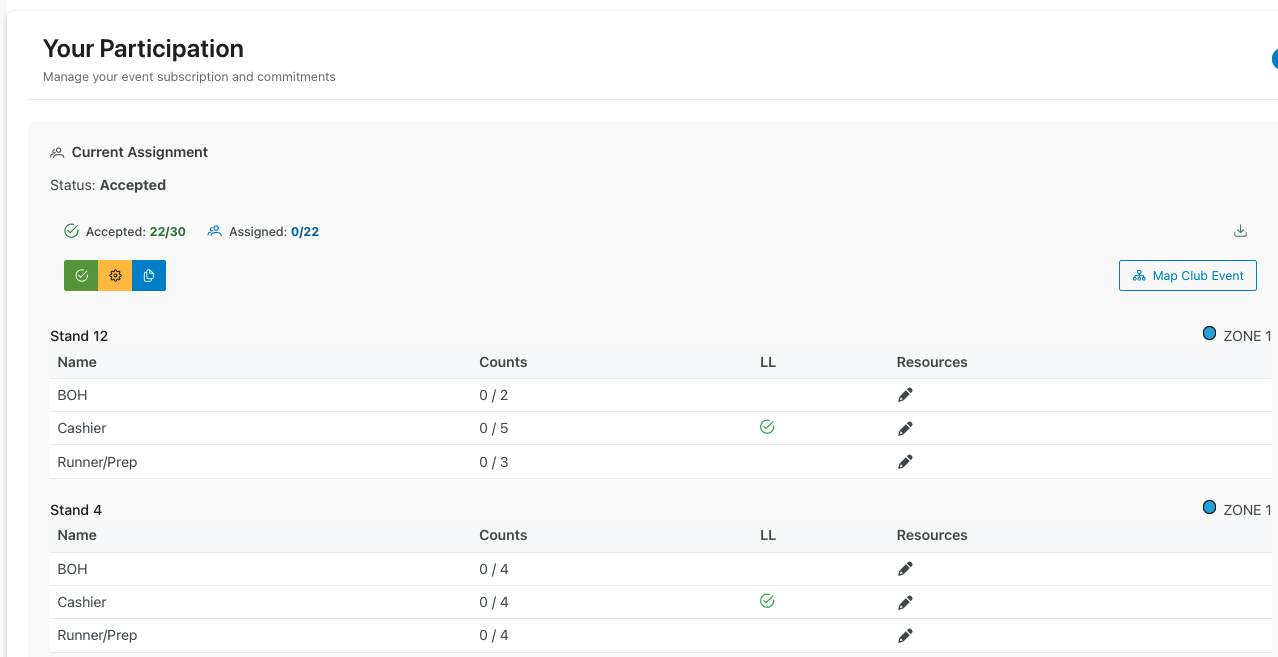 Accepted status showing assigned stands with positions, counts, and resource assignment options
- Click the pencil icon (✏️) in the Resources column to assign team members to specific positions
- Use action buttons:
- Green checkmark: Accept and confirm assignments
- Yellow settings: Modify assignments
- Blue notification: Communicate about assignments
- Map Club Event button available to view location details
Ready to Participate Card
- Prominent call-to-action asking "Ready to Participate?"
- Description: "Provide your commitment to join this event and help make it successful"
- Provide Commitment button: Green action button that opens the commitment/sign-up flow
- Information icon (ℹ) provides additional help or context
This workflow ensures clear communication between organizers and members throughout the event planning process.